Pruning
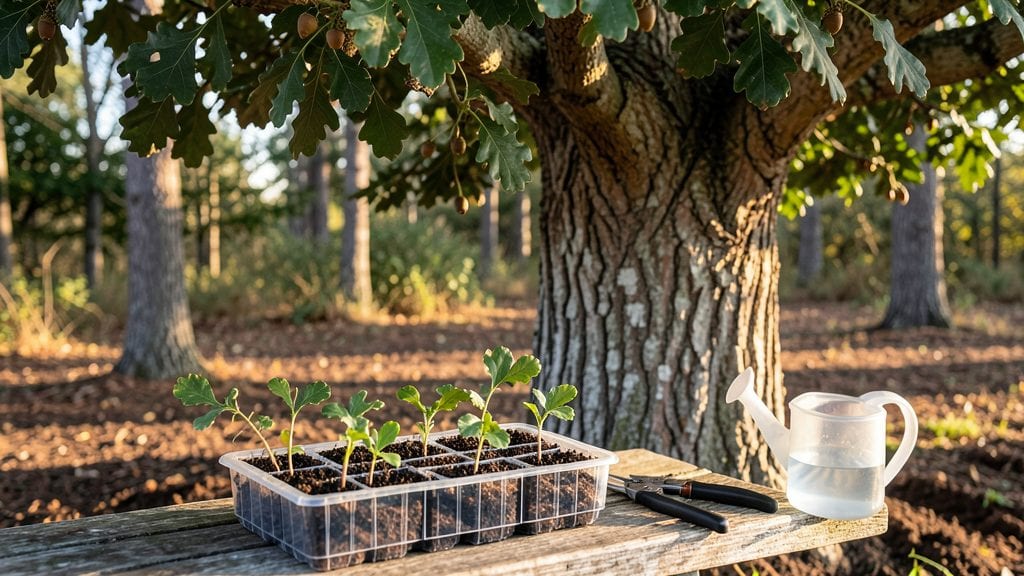
Growing oak trees from acorn seeds is one of the most rewarding challenges in gardening—if you get the cold stratification right. 🌱 I’ve tried the trial-and-error route, and these steps cut years off the process by mimicking nature’s way of breaking seed dormancy.
The key is patience and a simple setup that tricks the seed into thinking winter’s already passed.
You’ll need mature acorns (no cracks or holes), a plastic bag with moist peat moss or sand, and a freezer or outdoor cold spot. Most people skip the stratification step entirely, which is why their acorns sit there like nothing’s happening.
My first batch sprouted within 3-4 weeks of proper cold treatment—proof that this method works when done correctly.
Once sprouted, you’ll transplant into well-draining soil and watch those first leaves unfurl, a sign the tree is taking root. Early care focuses on keeping soil consistently moist but not soggy, and protecting seedlings from pests that see them as snacks.
By year two, you’ll have a sturdy sapling ready to stake its claim in the landscape.
This method works for red, white, or bur oak varieties, though germination rates vary. If your acorns refuse to sprout, it might be time to collect fresh ones—they’re only viable for about a year after falling. Here’s how to make it happen without the guesswork.
📚 In This Guide
- What you need
- Instructions
- Tips and common mistakes
- Wrapping up and next steps
What you need
- ● Fresh acorn seeds: 10–20 viable acorns (preferably from Quercus species like white oak or red oak). Ensure they’re plump, heavy, and free of cracks.
- ● Cold stratification medium: Option 1: Wet sand or perlite (sterilized, 50/50 mix with water). ~2 cups per 5 acorns.
- ● Option 2: Peat moss or coconut coir (moistened, not soggy). ~1–2 cups per 5 acorns.
- ● Containers: Plastic storage bag with a zip-top (for wet stratification).
- ● OR a sealed plastic container with a lid (e.g., a Tupperware).
- ● Labeling supplies: Masking tape + marker (to track seed types/dates).
- ● Spray bottle: For gentle misting (avoid over-saturating the medium).
- ● Glove: A pair of gardening gloves (acorns can stain and are slightly bitter!).
- ● Refrigerator: A standard fridge set to 34–40°F (1–4°C) (or a cold frame outdoors in winter).
- ○ Seedling trays + potting mix: For transplanting after stratification (optional but helpful).
- ○ Humidity dome: To maintain moisture during germination (optional).
- ○ Thermometer: To monitor fridge temps (optional but precise).
Step-by-step instructions for cold stratifying acorn seeds
Here's the straightforward method I use to break dormancy and ensure strong oak saplings.
🌱 Step 1: Harvest and Prepare the Acorns
Collect mature acorns from the ground in late fall—look for plump, heavy ones with no cracks or holes. The cap should still be intact, as this protects the seed during stratification. Rinse them gently with lukewarm water to remove dirt, then pat dry with a paper towel.
Remove any acorns that feel soft or have mold—these won't sprout. Store the selected acorns in a paper towel-lined container (plastic traps moisture and causes rot). Label the container with the date and oak species if you know it.
💧 Step 2: Moisten and Stratify for 90 Days
Place the acorns in a sealed plastic bag with a damp (not soggy) paper towel—just enough moisture so the towel feels like a wrung-out sponge. Seal the bag and place it in the refrigerator's crisper drawer for 90 days. This mimics winter's cold, breaking dormancy.
Check the acorns every 2-3 weeks. If the towel feels dry, mist it lightly and reseal the bag. If you see mold, discard those acorns immediately—they won't sprout, and mold spreads fast. The goal is consistent moisture, not wetness.
☀️ Step 3: Plant After Stratification
After 90 days, remove the acorns from the refrigerator and plant them 1 inch deep in a pot filled with well-draining potting mix. Use individual pots or a seed tray—oak seedlings hate being transplanted later. Water gently until the soil is moist but not saturated.
Place the pots in a bright, indirect light location (like a north-facing window) and keep the soil evenly moist. You'll see sprouts in 4-8 weeks, but some varieties take longer. Don't rush germination—patience here means stronger roots later.
⏰ Step 4: Care for Seedlings Through First Year
Once sprouts appear, move them to full sun (6+ hours daily) and reduce watering slightly—oak seedlings prefer slightly dry conditions. Fertilize lightly with a balanced, water-soluble fertilizer (half-strength) every 6-8 weeks in spring and summer.
By their first winter, your seedlings should be 1-2 feet tall. This is when you can transplant them outdoors in a protected spot. Real talk: Oak trees grow slowly, but consistent care now means a sturdy tree in decades—not just a sad sapling that dies in its first frost.
Tips & tricks for perfect acorn seed stratification
These practical tips will help you maximize your acorn sprouting success without the common pitfalls.
Selection Tip: Don't overlook the acorn cap! A fully intact cap means the seed is less likely to dry out during stratification. I always check that the cap is firmly attached before selecting acorns—it's your first line of defense against moisture loss. Confession: I skipped this step for years and wondered why so many acorns failed to sprout.
Moisture Management: The damp paper towel should feel like a wrung-out sponge—not dripping wet, not bone dry. I learned this the hard way after ruining three batches with either moldy or desiccated acorns. Use a spray bottle to add just enough water to maintain that perfect dampness, and always reseal the bag tightly after adjusting moisture levels.
Storage Strategy: The refrigerator's crisper drawer is ideal because it maintains consistent humidity and temperature around 35-40°F. If your fridge runs warmer, place the bag in the coldest part of the fridge instead. I've had better success with white oak acorns stored this way—they're more sensitive to temperature fluctuations than red oak varieties.
Lighting Insight: After the 90-day stratification, those first few weeks of bright, indirect light are crucial. I use a grow light on a timer for 12 hours daily during this phase. This mimics spring conditions and helps prevent leggy seedlings. Real talk: Natural north-facing windows work, but artificial light gives you more control, especially in cloudy climates.
Pro Tips for Acorn Tree Seeds
- These practical tips will help you maximize your acorn sprouting success without the common pitfalls.
- Selection Tip: Don't overlook the acorn cap!
- Moisture Management: The damp paper towel should feel like a wrung-out sponge—not dripping wet, not bone dry.
Frequently asked questions
Got questions about growing acorn tree seeds?
You’re not alone! Here are answers to the most common queries to help you succeed with cold stratification and sprouting.
How long does cold stratification take for acorn seeds?
Cold stratification for acorns typically takes 60–90 days in a moist, refrigerated environment (33–41°F). Oak species vary slightly—white oak seeds may need up to 120 days, while red oak seeds often sprout faster. Pro tip: Check moisture weekly to avoid mold!
When is the best time to plant stratified acorn seeds outdoors?
Plant stratified acorns in early spring (after the last frost) or fall (if your climate is mild). Fall planting mimics natural conditions, but spring gives seeds a head start. Warning: Avoid planting too early—soil should be workable, not frozen!
Can I skip cold stratification and still grow acorns?
Cold stratification dramatically improves germination rates—skipping it may result in 0–20% success. However, some gardeners soak seeds in warm water for 24–48 hours before stratification to soften the shell. Alternative: Try scarification (nick the seed coat) if you’re impatient!
Why aren’t my acorns sprouting after stratification?
Common culprits include:
- Old seeds (acorns lose viability after 1–2 years).
- Dry stratification medium (keep it damp, not soggy!).
- Improper depth (plant ½–1 inch deep; deeper = slower sprouting).
- Fungal issues (use sterile peat moss or vermiculite).
How do I know if my acorn seed is viable before planting?
Test viability with the “float test”:
- Fill a bowl with water.
- Drop 10 acorns in—viable seeds sink (dense), while hollow ones float.
- For extra accuracy, crack open a few: a firm, brown nut is good; a mushy or moldy one is bad.
Wrapping up and next steps
Growing acorn tree seeds into thriving saplings is a rewarding journey that blends patience with nature’s magic! 🌱 By mastering cold stratification, you’ve unlocked the secret to breaking dormancy and nurturing strong, healthy roots.
Whether you’re a seasoned gardener or a curious beginner, these steps empower you to cultivate the future of your landscape—one tiny seed at a time.
Ready to turn theory into action? Start with just a few seeds this season, track your progress, and soon you’ll be sharing your green success story with fellow plant lovers. Happy planting—your future oak tree is waiting! 🌳✨