Transplanting
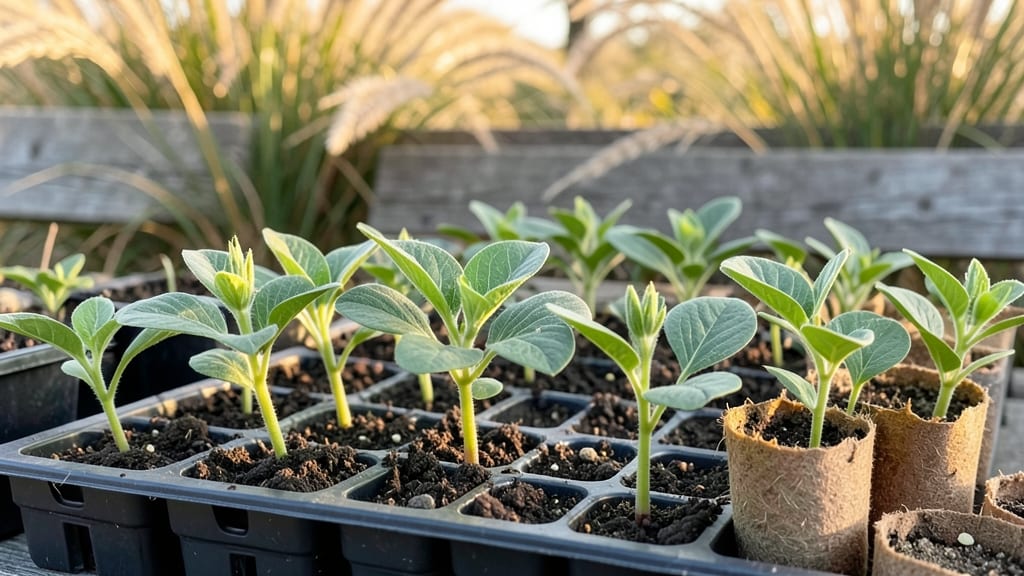
Growing thriving Four O'Clock seedlings 🌸 starts with the right transplant timing and care—miss the window, and you risk stunted growth or no blooms at all.
Struggling to keep your four o’clock seedlings thriving after transplanting can mean the difference between vibrant blooms and wilted disappointment—here’s the expert timing and technique to ensure success.
These colorful night-bloomers love full sun and well-draining soil, but their delicate roots need gentle handling. Plant them in April or May after the last frost, when soil temps hit 60°F, to give them the best start.
In this guide, I’ll walk you through the exact steps for transplanting, plus how to avoid the 3 biggest mistakes that kill seedlings before they even bloom.
Optimal transplanting timeline for Four O’clock seedlings
Transplanting your Four O’Clock seedlings at the right time ensures they establish strong roots and thrive into vibrant, blooming plants. The key is balancing seedling maturity, soil warmth, and frost risk—each factor directly impacts root development and flowering potential.
In my experience, timing this transplant just right can mean the difference between a lush garden and struggling seedlings.
Four O’Clock flowers (Mirabilis jalapa) are sensitive to cold, so understanding your USDA hardiness zone is critical. These plants prefer warm soil temperatures of at least 60°F (15°C) to prevent root shock.
If you transplant too early, your seedlings may wilt or fail to establish, while waiting too long risks stunted growth before the blooming season.
| Zone | Last Frost Date | Ideal Transplant Window | Seedling Age | Soil Temp Threshold |
|---|---|---|---|---|
| Zones 3-5 | Mid-May to early June | After May 15 | 4-6 weeks old | 60°F (15°C) minimum |
| Zones 6-8 | Mid-April to early May | After April 15 | 3-5 weeks old | 55°F (13°C) minimum |
| Zones 9-11 | Late February to March | After February 28 | 2-4 weeks old | 50°F (10°C) minimum |
For gardeners in Zones 6-8, the sweet spot is typically after your last frost date, when soil temperatures consistently reach 55°F (13°C). I’ve found that transplanting 3-5 week old seedlings at this stage gives them enough vigor to handle the transition without stress.
In colder zones (3-5), wait until after May 15 to avoid frost damage, even if your seedlings are ready earlier.
One of my biggest lessons came from transplanting too early in Zone 5. The seedlings looked healthy, but the chilly nights caused the roots to struggle, and the plants took weeks to recover.
Since then, I’ve made it a rule to check soil temperatures with a thermometer—never transplant before the soil warms up. A simple $10 soil thermometer can save you from costly mistakes.
Beyond frost risk, watch for seasonal cues like the emergence of new leaves on your seedlings. A healthy Four O’Clock seedling will have 2-3 sets of true leaves and a sturdy stem before transplanting.
If your seedlings are leggy or pale, they may need more light before transplanting. I often use a grow light for 12-14 hours a day to strengthen seedlings before moving them outdoors.
Another critical factor is moisture levels in the soil. Four O’Clock flowers prefer well-draining soil but hate soggy conditions. Before transplanting, amend your garden bed with compost or aged manure to improve drainage.
I’ve seen seedlings drown in heavy clay soil, so always test your soil’s moisture retention. Stick your finger in—if it’s damp but not wet, it’s ready for transplanting.
Timing also depends on your local climate. In humid regions, transplant in the morning or late afternoon to avoid stress from high heat. In arid areas, opt for early morning transplanting to give roots time to establish before the sun peaks.
I once transplanted in the afternoon in Zone 7, and the seedlings wilted by evening—never again!
Finally, don’t forget to harden off your seedlings before transplanting. Over 5-7 days, gradually expose them to outdoor conditions for increasing durations. Start with 1-2 hours in partial shade, then move to full sun.
This process mimics natural conditions and reduces transplant shock. I’ve seen seedlings that skipped hardening off struggle for weeks after transplanting, so this step is non-negotiable.
By following these timing guidelines, your Four O’Clock seedlings will establish strong roots, produce lush foliage, and reward you with vibrant evening blooms all season long. The key is patience—rushing the process can set you back, but careful planning pays off in stunning results. Happy gardening! 🌸
Step-by-step transplanting guide for healthy Four O’clock seedlings
Transplanting your Four O’Clock seedlings at the right time and with the right technique can make all the difference between a thriving garden and a disappointing failure. These tender perennials (though often grown as annuals) need gentle handling to avoid transplant shock.
The key is preparing both the seedlings and their new home before making the move. I’ve transplanted hundreds of these vibrant plants, and I’ve learned that soil prep, spacing, and post-transplant care are non-negotiable for success.
When your seedlings have 4-6 true leaves and are about 3-4 inches tall, they’re ready to graduate from their seed trays. This usually happens 6-8 weeks after sowing, depending on your climate.
The goal is to transplant them when they’re sturdy enough to handle the stress but not so large that their roots become tangled. Hardening off your seedlings 7-10 days before transplanting is crucial—this acclimates them to outdoor conditions and reduces shock.
Prepare Your Seedlings for Transplanting
- 🌱 Hardening Off: Gradually expose seedlings to outdoor conditions over 7-10 days. Start with 1-2 hours of sunlight daily, then increase to full sun exposure.
- 💧 Water Well: Water seedlings thoroughly 24 hours before transplanting to ensure roots are hydrated but not waterlogged.
- ✂️ Prune Leggy Seedlings: If stems are too tall or spindly, trim them by one-third to encourage bushier growth post-transplant.
Choose the Perfect Transplant Location
- ☀️ Sunlight: Select a spot with 6+ hours of full sun daily. Four O’Clocks thrive in hot, sunny locations and bloom best with maximum light exposure.
- 🪴 Soil Type: Amend your soil with compost or aged manure to improve drainage. Four O’Clocks hate soggy roots, so avoid heavy clay soils unless amended.
- 📏 Spacing: Plant seedlings 12-18 inches apart in rows spaced 18-24 inches apart to allow for air circulation and future growth.
Transplant Your Seedlings
- 🌿 Dig Holes: Make holes slightly larger than the seedling’s root ball to avoid crowding. The top of the root ball should sit just below soil level.
- 💧 Water Before Planting: Soak the hole with water to help roots settle into moist soil. This reduces transplant shock significantly.
- 🪴 Gently Transplant: Remove the seedling from its container, loosen tangled roots if necessary, and place it in the hole. Fill with soil and press lightly to secure.
Post-Transplant Care
- 💧 Water Deeply: Water thoroughly immediately after transplanting, then again every 2-3 days for the first 2 weeks to encourage root establishment.
- 🌱 Mulch Lightly: Apply a 1-inch layer of mulch around the base to retain moisture and suppress weeds, but avoid piling mulch against the stems.
- ☀️ Provide Light Shade: If transplanting in hot afternoons, use shade cloth for the first week to reduce stress on delicate seedlings.
After transplanting, your Four O’Clock seedlings may look a bit stressed—wilting or dropping leaves is normal. This is their way of adjusting to their new home.
To speed up recovery, I recommend avoiding fertilizer for the first 2-3 weeks; instead, focus on consistent watering and gentle pruning of any damaged leaves. Once they’ve established roots (usually within 3-4 weeks), you’ll see new growth, and those iconic vibrant blooms will begin to form.
One of my favorite tips for encouraging robust growth is to pinch back the tips of the main stems when seedlings are about 6 inches tall. This promotes bushier growth and more flowers.
Just use your fingers or clean scissors to snip just above a set of leaves. Your plants will thank you with a fuller, more productive display come blooming season.
With these steps, your Four O’Clock seedlings will transition smoothly into their permanent home, setting the stage for a garden bursting with colorful evening blooms. The key is patience—give them time to adjust, and they’ll reward you with months of stunning flowers that open only after the sun sets.
Happy planting! 🌸